
Est. 2002


Tell Me More

This video is the first in a series of a free Excel accounts tutorials.
After you have watched the first one, take the quiz, then when you're ready move on to the next video.
Bookkeeping! The word is enough to drive anyone who is currently running a business into a panic. Keeping the books on all of your accounts can be something that you put off until you have time to it. The trouble is that that time rarely, if ever, comes.
The trouble is, you're too busy actually running your business. So if why should you do your accounts when there's another painting job to be done, car to be repaired or wall that needs plastering.
Then at the end of the month, or longer, you sit down and look at all the receipts that have piled up. You then look at the blank spreadsheet on your screen. Or it could be worse, it could be that you're looking at an accounts package or complicated spreadsheet template seeming more designed for a large organisation's tax return than simply being a record of expenses and money received.
You see that's all that you need as a one person band. You simply need the ability to total up all of the money you've received. Then add up all your expenses and see how much you have left.
Also, a running total might be handy. That way you can see how your finances are at any point in time. Then, looking back, you can see when you had the most money and when you had almost nothing.
If you simply want to download the template you can find it at the bottom of this page.
This tutorial is one of a series of Accounts Tutorials that you are encouraged to follow. As a result you will learn everything from creating a basic accounts worksheet to a Pivot Table. Also, you will learn many everyday Excel hints and tips.
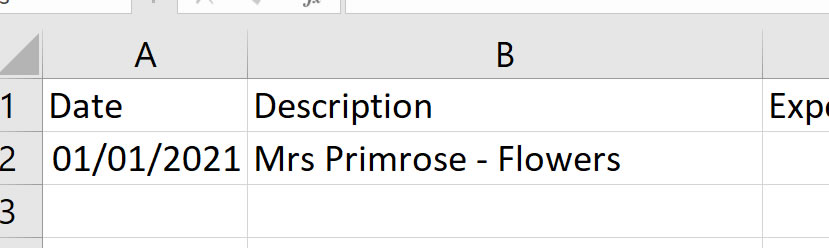
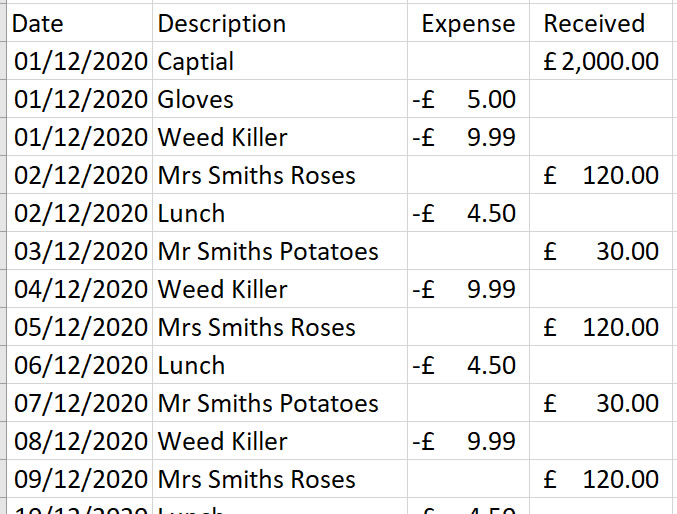
The first thing you need to do, after opening a blank spreadsheet, is to enter in the column headings. These headings will determine the information you will enter into your accounts spreadsheet.

| Date | Under this heading you will enter the date of the transaction. Meaning every time you buy or sell something you will enter in the date. |
|---|---|
| Description | Under this heading you will type the description of the transaction. Try to be as consistent as possible when typing in repeated receipts and expenses so that the match the previous one. You will learn more about the importance of this later on. |
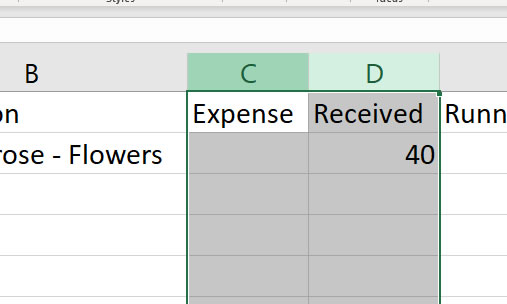
| Expense | If your entry is an expense then you will enter the number here in minus or negative numbers. This is because it is an expense you will be reducing your money. |
| Received | Any money received from work, you will enter under this column. You will do this as a positive figure. Because it is increasing your money. |
| Running Total | In this column you will enter a formula that will calculate the running total. This will allow you to see how much money you have at any one time. |
Now that you have your column headers, it's time to start entering your accounts. The key here is to be accurate.
When it comes to entering dates you should enter them using the forward slash. For example: "01/01/2021" would be the way you would enter the 1st of January 2021.
Quick Tip: Hold Ctrl & ; to the current date.
In entering the description of the expense or receipt you should be consistent. You also don't need to type in too much detail. So, for example, if you spent time mowing Mr Henderson's lawn you could enter something like "Henderson - Lawn". This would be preferable to writing: "Mowed Mr Henderson's lawn in the morning".
The more consistent you are, the easier it is to analyse your accounts. Why would you want to analyse your accounts? Well consider the following situation:
Your Gardening business has really taken off and you are maxd out and you need to drop a client or two so you can have time to work on your business. So you want to see how much money each one of your clients is worth to you. Financially that is.
If you wrote "Henderson - Lawn" consistently every time you mowed Mr Henderson's lawn it will be so much easier to work out how much money you've earned from Mr Henderson. Coupled with the date you entered earlier you'll also be able to see how Mr Henderson has paid you each month. No matter how frequently or infrequently you mow Mr Henderson's lawn or any other job for Mr Henderson, entering consistent data makes it straightforward to see how much he's spending with you.
Entering Accounts Description - Good Example
Enter Accounts Description - Bad Example

The chances of the bad example being consistent are extremely low. Plus you don't need the extra words like "Went to do" or even the the type of flowers you were working with. That is, unless, you're a flower shop and want to analyse the most popular flowers.
When it comes to entering expenses you will enter them using negative values. This is because each expense is money that you pay out to run your business. Things like lunch, supplies, anything you need for the day to day running of your business.
Once you've started entering numbers in Excel you'll want to know how to change numbers to currency on Excel. One time waster is typing in the Pound or Dollar sign every time you add your expenses or receipts. A better practice is to change the look, or format, of the numbers all at once. To change the format of expenses and receipts in Excel you can:

Now, when you start entering your accounts expenses and receipts in Excel, the numbers will have the currency symbol added. If you are asking how do I change the currency in Excel, you can use the tiny drop down triangle to the right of the Accounting Number Format button.
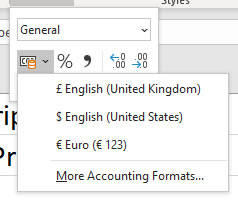
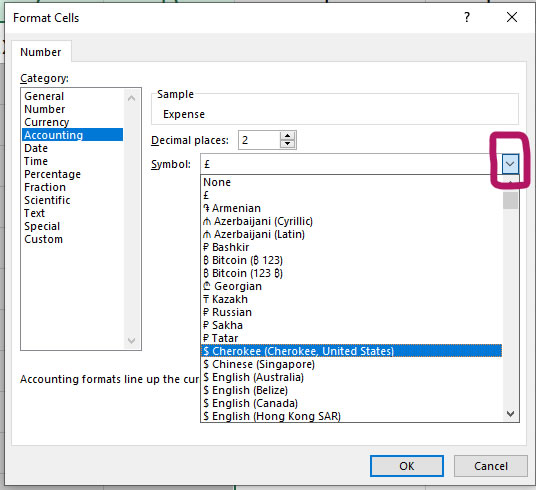
As you can see you can choose either Dollars or Euros. If you are looking for a currency other than Dollars or Euros in Excel then from the Accounting Number Format drop down list you can choose "More Accounting Formats". You can then use the Symbol drop down arrow in the Format Cells dialogue box to choose the currency format you require.
When it comes to money received I must admit that I was a little confused when at first I looked at the work receipt. You see I thought that a receipt was something I was paying out or spending. This was because every time I bought something, I would receive a receipt. So it must be the money I spent right? Wrong!
In accounting a Receipt is the word used to describe the money received. That is money that you have received. So whether, in your accounts, you use the column header "Receipts" or "Received" is up to you. Just as long as you're clear that the purpose of this column is to list all of the money you have received for any work you're done.
So if you've been following along with the above tutorial, you should now have an Excel Bookkeeping Spreadsheet that looks similar to this:
Now that you have taken the time to enter all of your expenses and receipts in your bookkeeping spreadsheet, it's time to add up how much you've made and how much you've spent so you know how much money you have left.
By knowing and understanding how to sum column in Excel the task of totalling you're expenses and receipts is quick and straightforward.
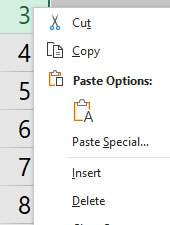
Before you start typing in the formula to sum your bookkeeping sheet you need to know how to insert blank rows in a sheet. It's so much better that these summary formulas be at the top of your bookkeeping spreadsheet because these are the figures that you will be looking at most often.
Now that you have inserted multiple rows you can use Excel to sum the rows of your expenses and received columns. Just so you know after you've finished your bookkeeping spreadsheet should look something like this:
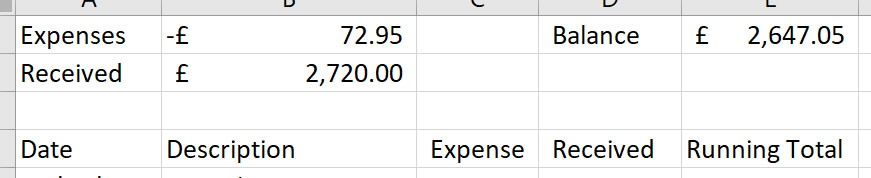
Of course the numbers might be a little different but so long as the formulas are correct, you'll be fine. Here are the formulas:
| Cell | Formula |
|---|---|
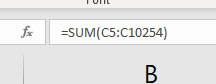
| B1 | =SUM(C5:C10000) |
| B2 | =SUM(D5:D10000) |
| E1 | =B1+B2 |
You can either type the formulas in or use the Auto Sum button.

If you would prefer to use the Auto Sum button to help you write the formula, do the following.
You will need to do the same to add your receipts. But this time you will sum column D.
OK, nearly done, you now need to know how much money you have. This is known as the current balance and is calculated by taking away your expenses from your receipts. Now, in this bookkeeping template, your expenses are already entered as negative numbers you will add them. This is how you work out the current balance.
You should now see your current balance.
Sometimes seeing the current balance isn't enough. Maybe your bank charged you for going into the red once during the last month. You want to compare your figures with the banks to see if they match. This is now possible without a running total.
A running total will allow you to see your balance at one point in time. So if your bank said that you went into the red on the 15th of the month you could check to see why.
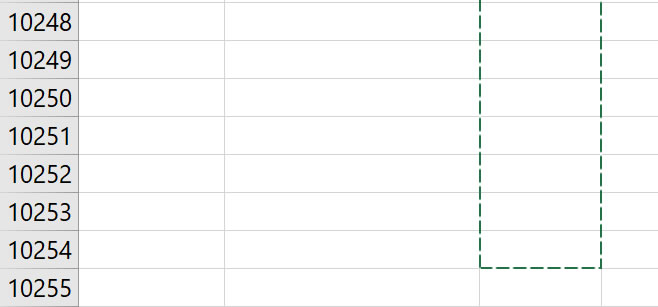
To create a running total you will use the Auto Sum feature. However, you will also need to know how to do cumulative sum in Excel. To do this you will add a dollar sign to the first part of the formula. The purpose of the dollar sign is to fix the top part of the formula. This way the running total becomes a cumulative sum adding up all the previous numbers as you copy the formula down the sheet. This is how to do it:
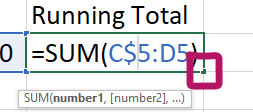
Now, because you've added a dollar sign in between the C and the 5 you have fixed that part of the formula. Think of the dollar sign as a nail. So in effect you are nailing the first part of the formula so that as you Auto Fill down the SUM function is cumulative Sum. See the below video to see an example.
Or if you want to jump to the Auto Fill section in the tutorial and see how to apply a formula to an entire column. Use Auto Fill in Excel - 12:58
There you have it, all you need to do the basic bookkeeping in Excel. In the next tutorial we will focus on how to make your spreadsheet look pretty. All the accounts tutorials along with a comprehension quiz can be found on our Easy Spreadsheet Accounts page. Make sure you come back regularly to see updates.


Sign up to receive our monthly newsletter including special promotions, hints & tips, and the latest Computer Tutoring news!
Computer Tutoring takes your privacy seriously and collects essential information such as your name, email, and course preferences to facilitate our services. Additionally, we use cookies to personalise your experience and for Google Ads personalisation, which helps us deliver more relevant advertising to you.
We do not share your personal data, except for specific use-cases like payment processing via PayPal and sending you updates via Mailchimp, if you've opted in for those services. Our site may also use Google Analytics to improve user experience and features links to other websites. Please be aware that Google's Privacy Policy may differ from ours.
We do not store your credit/debit card details. You have the right to access, amend, or request deletion of your personal data by contacting us at info@computertutoring.co.uk.
By using our website, you consent to our use of cookies for the purposes outlined above.
For more details, please read our full Privacy Policy.


